Autumn is a season when we see landscapes being transformed into a golden wonderland. Slowly, the surroundings turn into gardens full of fiery red leaves and soft golden light. One would say that fall photos have their own magic. Many people will be tempted to freeze those moments. Knowing how to do your own fall photo edit is essential to carrying the atmosphere from the input to the final result.
If you are unfamiliar with the techniques or approaches, here is a quick guide that will help. Learn how to boost colors, add contrast, and adjust shadows to achieve a specific fall aesthetic. Create photo edits that will evoke nostalgia, coziness, and storytelling potential.
I will cover editing with well-known photo editors like Adobe Lightroom and Photoshop—Camera Raw, as well as free ones like the web-based Photopea. The article will discuss a couple of editing techniques and preset options.
Editing Basics for Fall Photos
1. Enhancing Warm Tones (Reds, Oranges, Yellows)
One specific characteristic of autumn is the vibrant, warm-colored foliage everywhere. The aim is to create cozy, warm-toned edits.
You can start by increasing the temperature slightly to add that warmth accent. To make the reds, oranges, and yellows look fresher, adjust and add saturation and vibrance.
If your editor allows it, use the HSL (Hue, Saturation, Luminance) sliders. Photoshop and Lightroom both have them. Besides boosting the saturation, you can play with Hue—especially the reds and oranges. Move the slider until you achieve more natural fall tones. Then move to luminance and lighten the yellow and orange colors until you get a better glowing effect.
A significant advantage of certain editors can be the split toning or color grading feature. You can separately change the highlights into more warm, golden, orange tones while keeping the shadows slightly cooler for contrast.
Certain editing programs let you add subtle gradient filters, which can warm up the treetops or sunlight patches.
For instance, if you think your fall photo edit can benefit from the Dehaze feature, a slight touch of it can enhance color vibrancy. This is particularly useful when you have misty morning images. The best idea is to use it when you have misty morning images.
You can also make selective adjustments with brushes, such as enhancing clusters of leaves without oversaturating the whole image.
If your photos include people, keep the skin tones natural while enhancing foliage separately.
2. Balancing Contrast and Shadows
The light in the fall can be soft or flat. However, if you want your pictures to have depth and dimension, it is important to work with contrast and shadows.
Try to add contrast so your fall photo edit will become more vivid. Adjust your shadows to show certain areas of your image that are slightly hidden, such as shaded leaves or tree trunks. If you are simultaneously changing the highlights, try to retain the sunlight glow without blowing out bright spots.
Consider using Curves to achieve more precise tonal control. To add proper punch to your colors, play with the blacks and whites and set proper black-and-white points.
Use the vignette to draw the viewer’s eye into the vibrant center. Additionally, apply dodge and burn to selected areas (light hitting leaves) while darkening others for better focus.
3. Making Skies Pop (Teal/Blue vs Orange Look)
The sky in your fall photo edit can dramatically influence the overall mood. You can choose to complement warm fall tones with a contrasting sky, making the final image more appealing and less flat.
You can start by adjusting the hue and saturation to deepen the skies. If you want a more cinematic look, try the combination of teal and orange. Enhance teal/cyan in the sky while boosting the oranges in leaves and highlights.
If you want to change the sky in your fall photo edit without touching foliage, use graduated filters in case you are working with Photoshop or Lightroom. One of those filters can be used for a polarizing effect. It will deepen the sky tones and reduce the glare on leaves. But be careful and try to avoid your sky getting artificial blue tones.
As I stated earlier, you can use the split toning to select cooler tones for shadows while keeping the highlights warm.
Also, check your white balance. If you want to emphasize the sky, use cooler WB, and if you want the foliage to stand out, use warmer WB.
4. Adjusting Greens
Early autumn foliage is still full of green. If you leave it as it is, you can get an image that looks too saturated or clashes with the warm tones.
In the same way that you have changed the HSL colors sooner, a similar approach works here, too, with slight changes. For hue, shift the greens toward yellow so they will blend more with the fall colors. Then reduce saturation a little bit so your greens will not overpower the oranges and reds. And for luminance, you can lighten the greens if your fall photo edits crave a softer look or darken them to get a richer forest feel.
Using split toning, filters, or local adjustments can also change the grass and background trees, especially if certain green areas are too distracting.
Even desaturating greens, don’t overdo it because you may lose some contrast and freshness.
If you work in Photoshop, use the Selective Color Adjustments. You can fine-tune the greens while leaving the rest of the image intact.
Examples
Adobe Lightroom
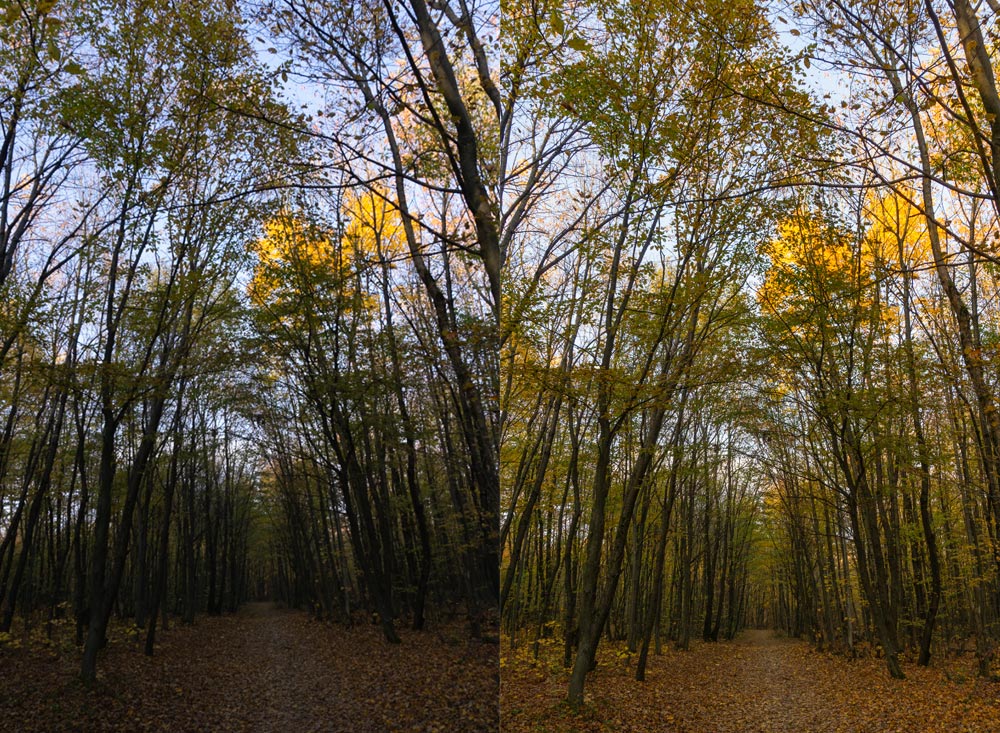
Settings for the above image
Exposure: + 0,35
Contrast: + 9
Highlights: - 42
Shadows: + 89
Whites: - 27
Blacks: + 10
Temp: 6912
Tint: 0
Vibrance: + 5
Saturation: + 7
Color Turquoise
Hue: - 49
Saturation: 0
Luminance: + 20
Color Green
Hue: - 11
Saturation: 0
Luminance: 0
Highlights Color Grading
Luminance: + 6
Blending: 50
Balance: 0
Shadows Color Grading
Luminance: - 15
Blending: 50
Balance: 0
Texture, Clarity: 0
Dehaze: + 12
Vignette, Grain: 0
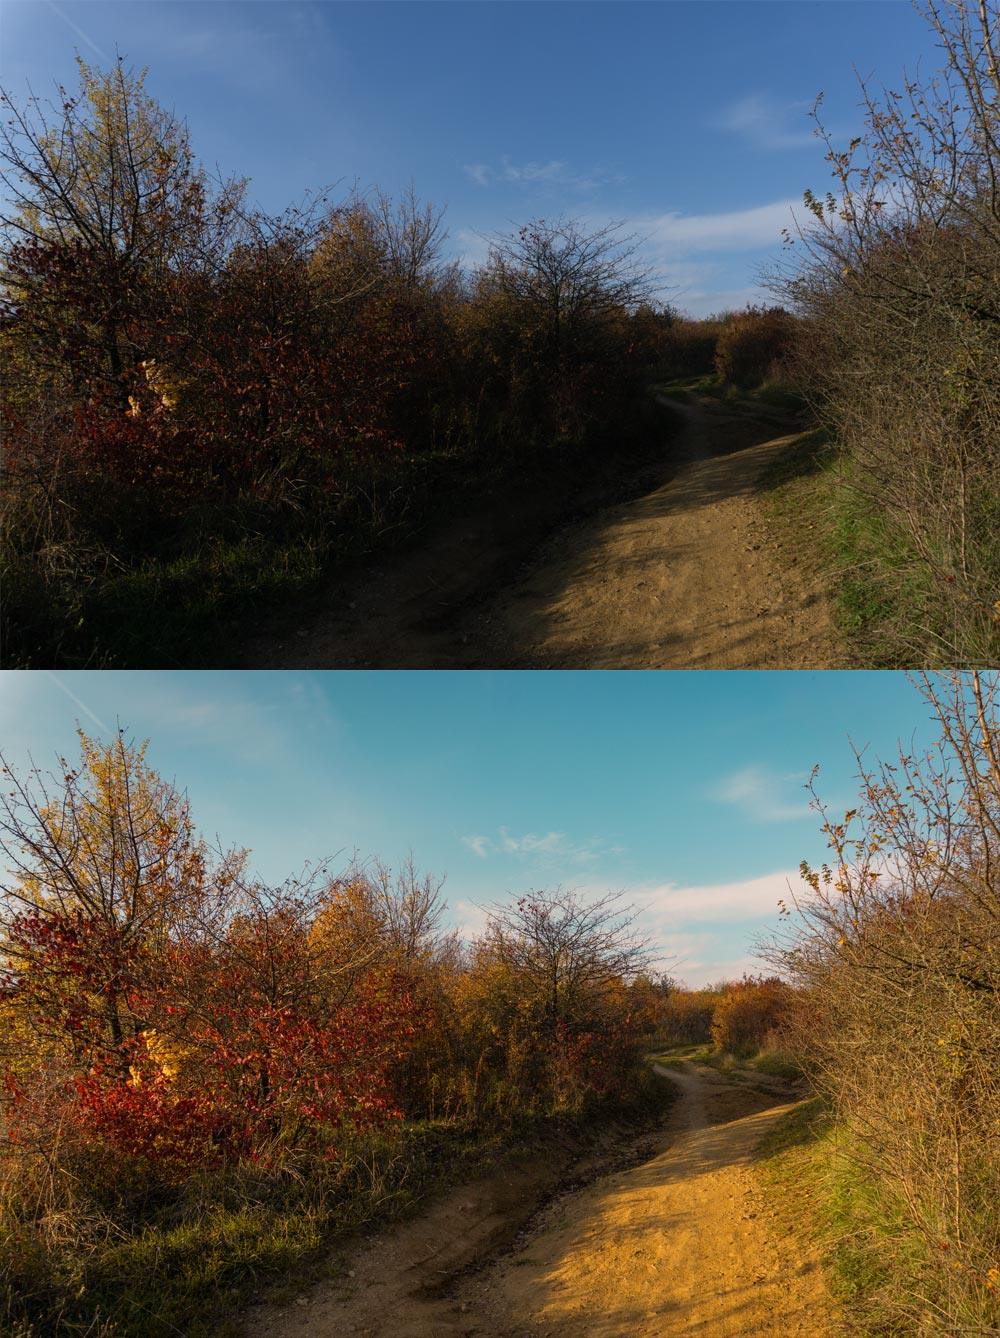
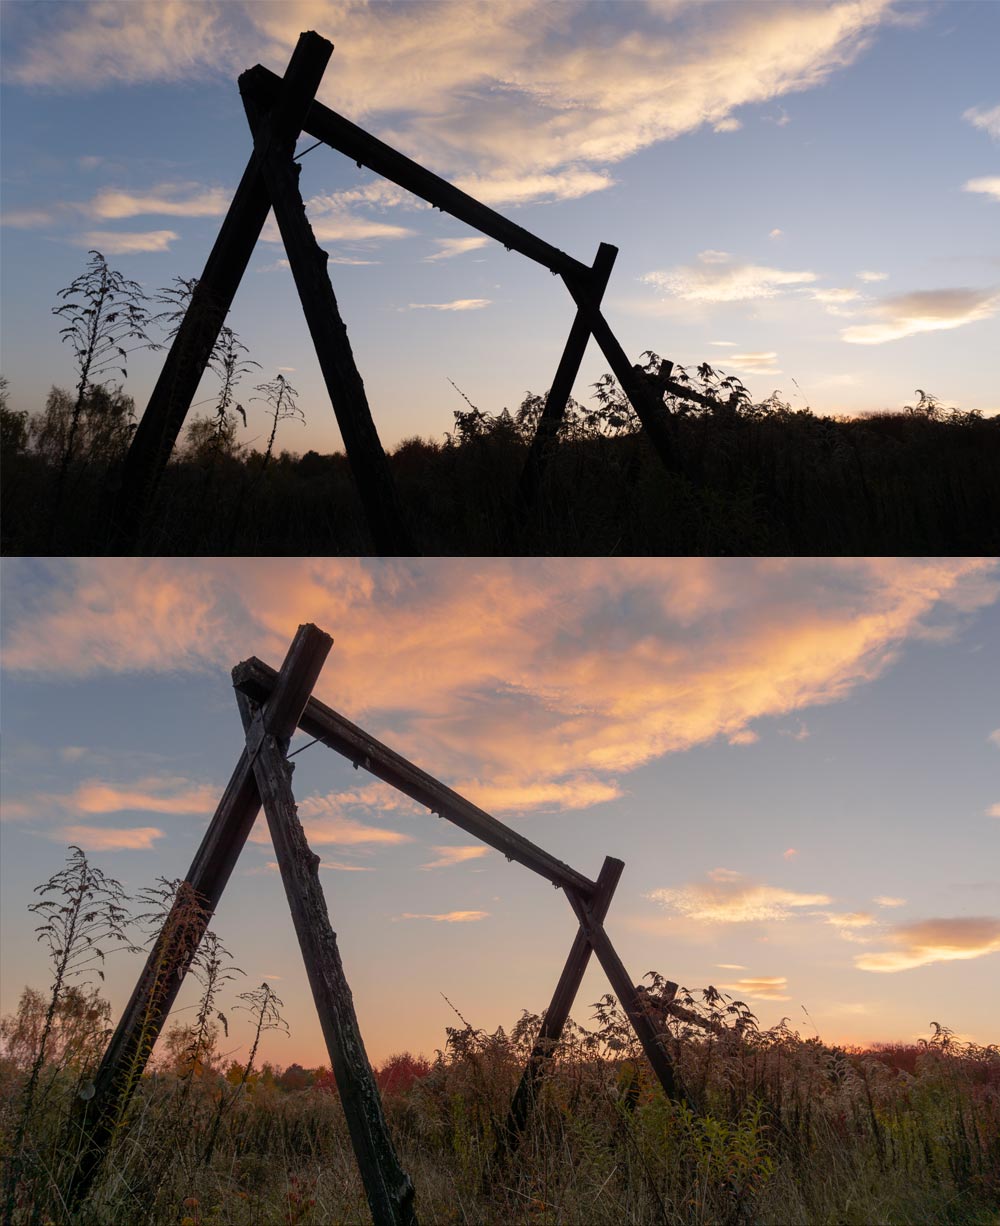
Setting for the above image:
Exposure: + 1,03
Contrast: + 6
Highlights: - 54
Shadows: + 64
Whites: - 39
Blacks: + 14
Temp: 6434
Tint: + 10
Vibrance: + 8
Saturation: + 6
Color Green
Hue: - 82
Saturation: 0
Luminance: 0
Color Orange
Hue: 0
Saturation: + 11
Luminance: - 2
Color Blue
Hue: - 27
Saturation: 0
Luminance: 0
Highlights Color Grading
Hue: 41 Sat: 29
Luminance: 0
Blending: 50
Balance: 0
Shadows Color Grading
Hue: 265 Sat: 12
Luminance: 0
Blending: 50
Balance: 0
Texture, Clarity: 0
Dehaze: + 9
Vignette: - 12
Grain: 0
Photopea
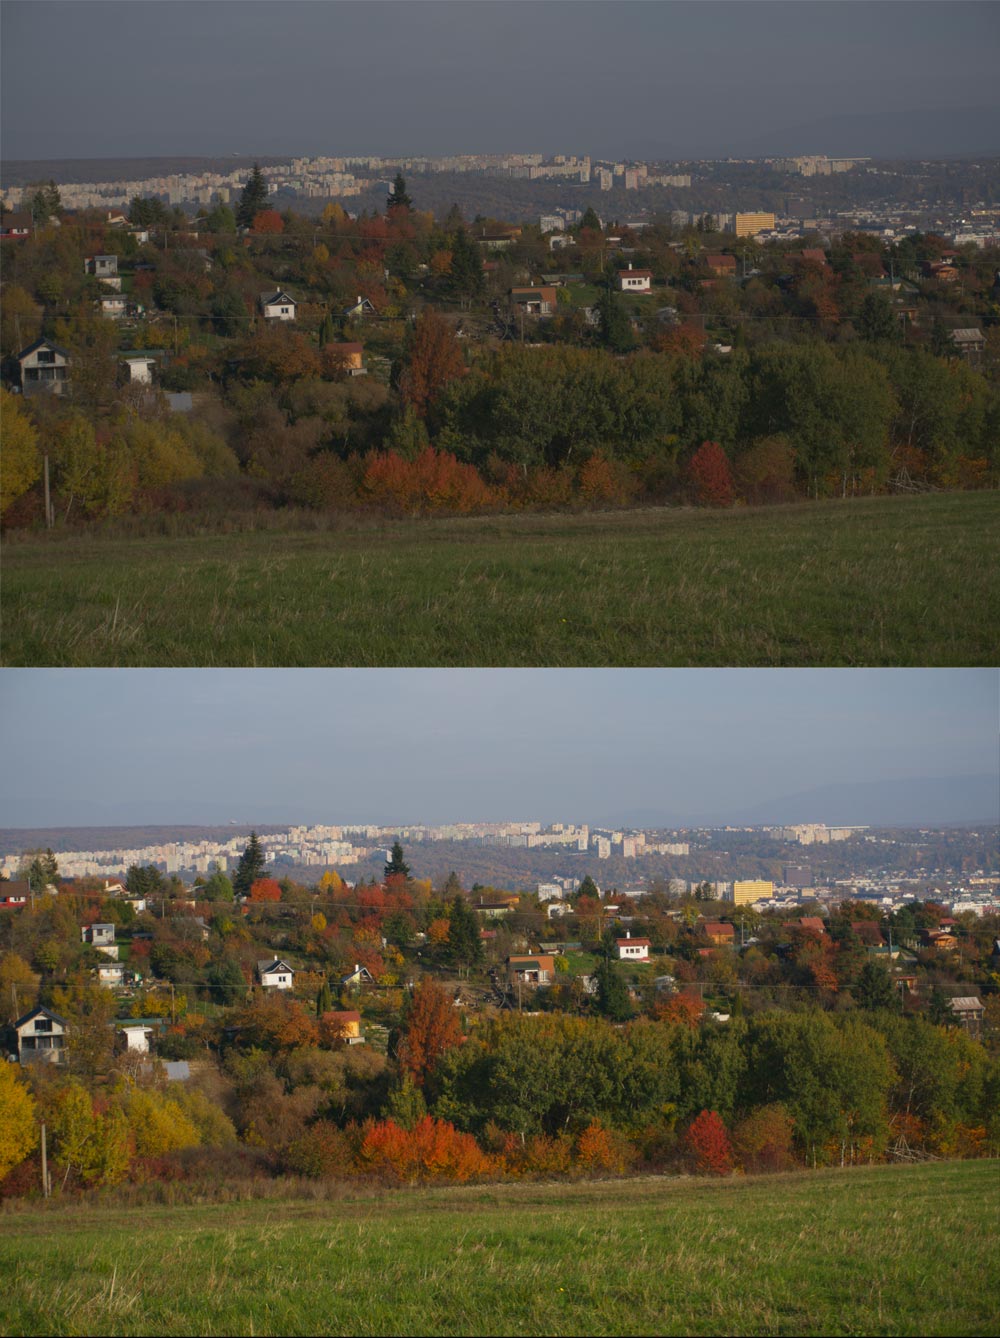
Settings for the above image:
Exposure: + 0,3
Contrast: + 45
Highlights: 0
Shadows: - 13
Whites: 0
Blacks: 0
Temp: 5327
Tint: + 45
Vibrance: 9
Saturation: 10
Adobe Photoshop
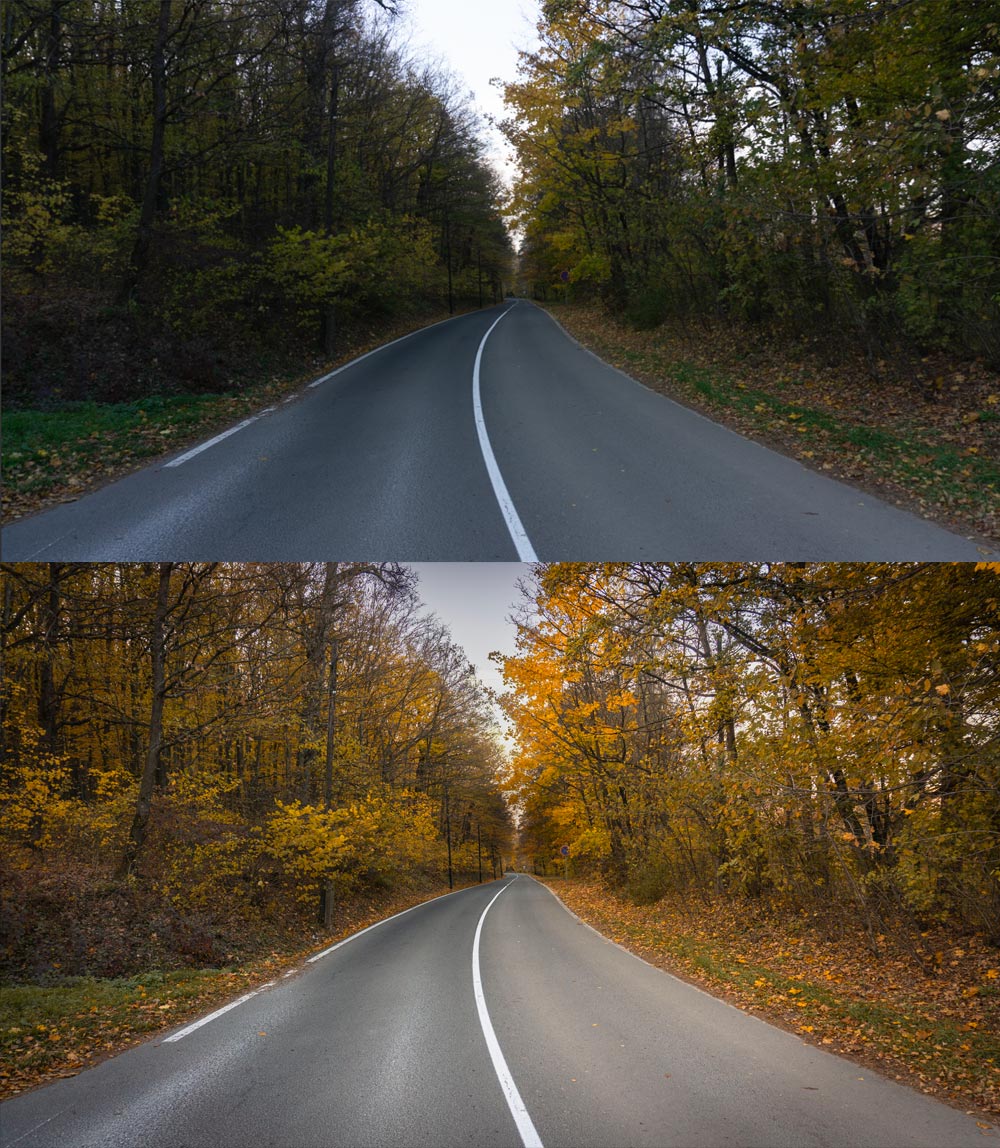
Settings for the above image:
Exposure: + 0,55
Contrast: + 18
Highlights: - 49
Shadows: + 58
Whites: - 38
Blacks: + 30
Temp: 7500
Tint: + 14
Vibrance: + 4
Saturation: + 6
Texture: + 6
Clarity: + 2
Dehaze: + 8
Vignette: - 28
Grain: 0
Color Mixer Hue
Reds: + 48
Yellows: - 41
Greens: - 85
Magentas: -1
Color Mixer Saturation
Reds: + 7
Oranges: + 8
Yellows: + 8
Greens: - 10
Color Mixer Luminance
Greens: + 8
Plus additional separate masks for the sky.
Settings for the above image:
Exposure: + 0,05
Contrast: + 18
Highlights: - 41
Shadows: + 80
Whites: - 34
Blacks: + 18
Temp: 6350
Tint: + 10
Vibrance: + 5
Saturation: + 6
Color Mixer Hue
Oranges: - 40
Greens: - 97
Aquas: - 12
Purples: - 17
Magentas: - 3
Color Mixer Luminance
Yellows: - 20
Greens: + 5
Blues: - 5
Presets
If you don’t have enough time for editing, you can always use presets. There are many free and paid ones you can choose from. Many are available online on Etsy, Gumroad, and Creative Fabrica. You can also check the separate websites of professional photographers or photo editors. There are also built-in presets in Photoshop and Lightroom.
Look for presents created for autumn that can enhance warm tones, soften greens, and add a cozy atmosphere. One of the downsides is that they rarely work without additional changes. You need to apply the filter and then fine-tune the exposure and gradually change the colors. After that, you can save your own adjustments as a new preset.
If your images were taken in similar lightning conditions, you can batch edit more pictures and keep your gallery cohesive.
Some presets can add too much saturation or grain, so constantly re-check your images if they feel too artificial. This is a common mistake to avoid in fall photo editing. It’s important to maintain a balance between enhancing the fall aesthetic and preserving the natural look of the image.
Tips for natural vs. moody fall vibes
Your fall photo edit will shape your photos’ overall mood and story. Some autumn shots look better with bright and warm tones, while others deserve a more moody, dark, and dramatic look.
Natural Look
- Change the white balance to warmth, but make it subtle without changing the whole image into orange.
- Soften greens, but don’t shift them too far away from reality.
- Use moderate contrast if you want to preserve detail in shadows and highlights.
- Use color grading, choose golden highlights, and keep your shadows neutral to achieve a more airy, timeless look.
Moody Look
- Make the shadows cooler by adding blue or teal tones to shadows, but keep the highlights warm.
- Lower your exposure to achieve that darker and moodier feel.
- To get more drama in your fall photo, edit boost blacks and reduce highlights.
- You can also slightly desaturate greens and yellows while keeping orange tones dominant.
- Add some grain or a matte if you want a more film-inspired vibe.
- Vignette can intensify the mood, while darkening the edges can keep the eye on the center.
Conclusion
The key to a successful fall photo edit is to use adjustments with intention. You need to find the balance between enhancing nature’s colors and expressing your creative vision. Editing tools and presets are just starting points. Don’t be afraid to experiment. Try to develop your own unique fall aesthetic. The more you practice, the better your results will align with your visions.
If you’re inspired to take your photography further, a great next step is to get outside and capture the world around you. Check out Wander and Shoot: A Creative Guide to Photo Walks.