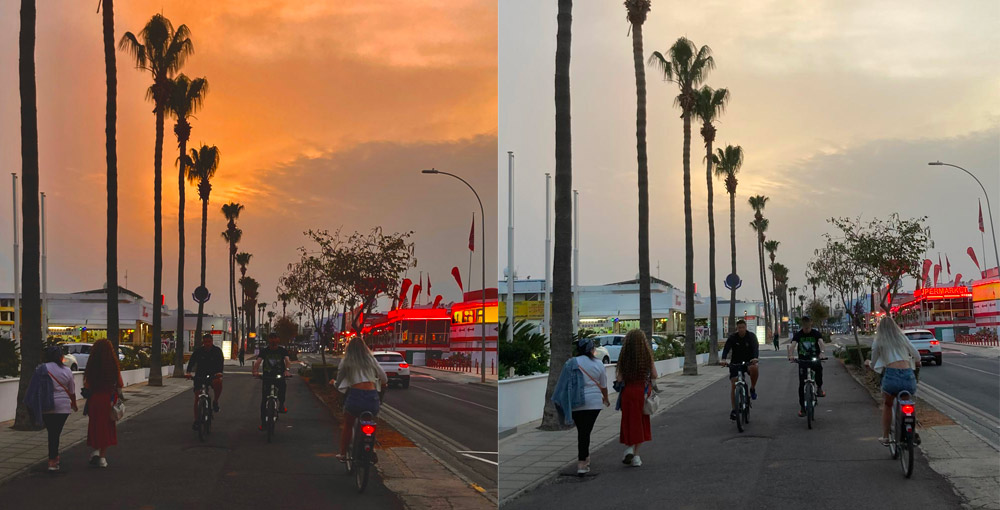
The reason behind the need to adjust any photo taken by a camera lies in the ability of the human eye to see a wider dynamic range than the machine. Any adjustments help to restore the vibrancy and details that might not be visible at first glance. This article shows you how to edit a sunset photo on iPhone in JPG format. Suppose you are looking to have more control over the process of shooting in HDR and RAW. This option is primarily available for people with iPhone Pro models or those who use third-party apps, which I will not cover in this article.
Sunset photos are a common subject in many pictures, not only the ones you take on your vacation. Shooting during the golden hour is highly encouraged, but post-processing and any touch-ups are important, too. You will find that editing only with your mobile camera’s built-in app is surprisingly easy, and the tool is powerful enough to create stunning results.
All the example images were taken with an iPhone and shot on various occasions in different places and conditions—both sunny and cloudy.
Choosing the Right Photo
You should select one or more photos that have position and focus. That means they follow the rule of thirds, leading lines, or focus on silhouettes. Sometimes, the composition can be achieved by final crop. When selecting the photos, avoid the ones that are overexposed or blown out. In such cases, it is hard to restore and save extremes. If the image is underexposed, it is far easier to bring some details back to life.
Open the Photos App
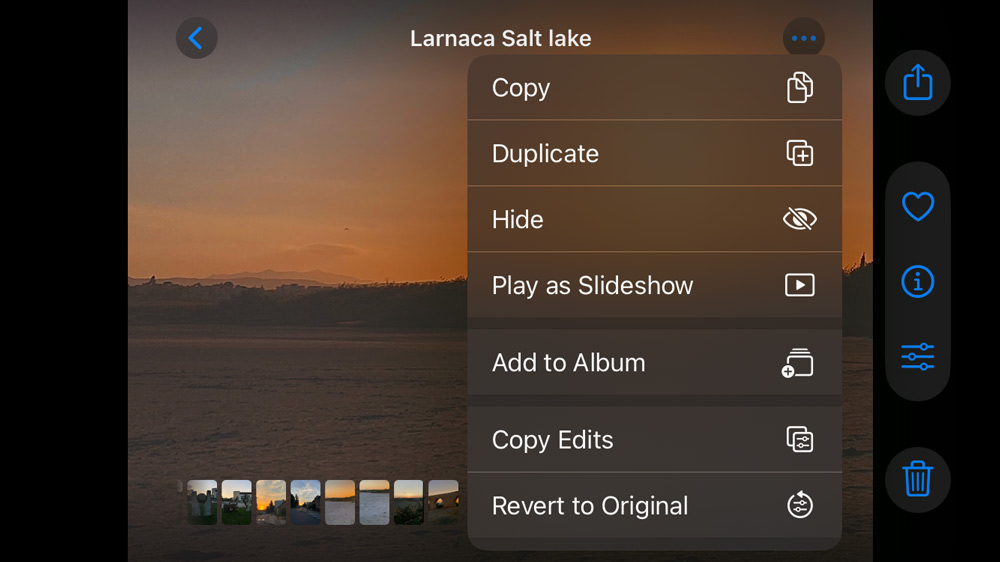
Go to your Photos App and find the picture you want to edit. Before you make any edits, it is wise to create a duplicate. Tap on the image to see three dots in the top right corner. Click on them, and a menu will pop up. Then select Duplicate. Go and check if the photo was duplicated, and if so, choose one of them. The duplicate is usually added as the last photo.
Now, you can start with the edits while still having the original photo in case you make destructive edits. It is also possible to go back to the original photo by choosing Revert to Original in the same menu through which you created the duplicate. The problem is that if you revert to the original image, you can not restore your edits, so be careful with it.
Start with the Overall Light
Select the picture and tap on the slider icon at the center bottom next to the bin icon. A new menu under the photo will appear with features like Adjust, Filters, and Crop. Each of them comes with its submenu. You will be taken directly to the Adjust feature. You can use Auto-adjust to see the changes. Between both menus is a slider that lets you adjust the strength of each submenu feature, including the Auto feature.
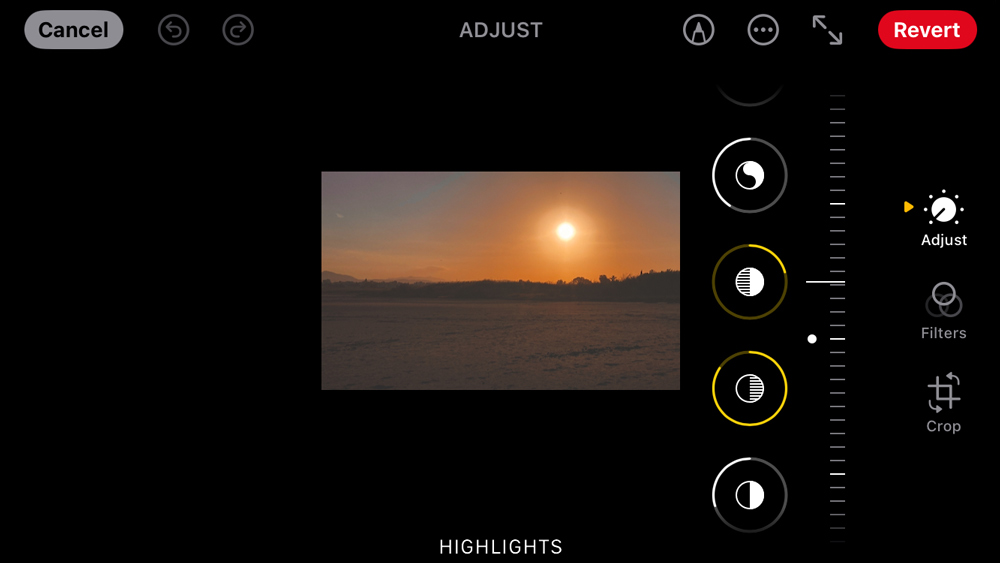
For manual adjustments, start with the Exposure. Use it to bring out details in darker or lighter areas. Then, proceed to change the Highlights and Shadows. Pull down Highlights to recover detail in bright sky areas. Then lift the Shadows to reveal darker foreground elements. You can change the Contrast, but only slightly, to add some depth.
To enhance the color, you can continue to play with Saturation, Vibrance, Warmth, or White Balance. Add Saturation to intensify the colors a little bit, but be careful and don’t overdo it. Vibrance is subtler than Saturation and helps the color without diminishing the skin tones too much. Warmth and White Balance enhance golden tones. But if you want to get a moodier dusk, look cool.
Fine-Tune with Advanced Tools
Some additional steps can include changing the Brilliance, which usually boosts details and balances Exposure intelligently. If you want to increase local Contrast and get a crisper, more textured look in clouds, waves, or landscapes, use Definition. Sharpness can make the silhouettes and horizon lines stand out. Some areas of your photos need to get rid of noise. Use Noise Reduction but sparingly. Too much can soften details and give the photo a smooth, almost cartoon-like look, causing textures to be lost. If you want to draw more attention to the center, use Vignette to darken the edges.

Creative Touches
There is still some room to play with the photo. If you want, you can try converting it to black and white, especially if you have a picture with stronger shadows or silhouettes. You can use some of the Filters for it.
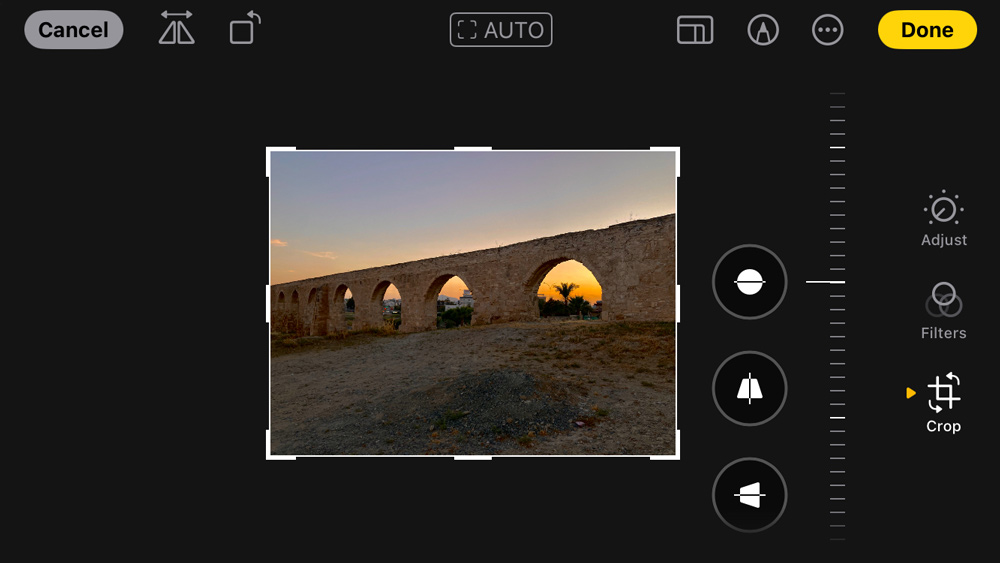
Before you save the final result, think about cropping the image. Sometimes, it can help the overall composition. Use the Crop feature to straighten the lines of buildings or surfaces. You can do it manually by selecting the Auto mode in the top center. To change the aspect ratio from Landscape to Portrait or vice versa, select the third icon in the top right corner.
Save and Compare
During the process, you can anytime tap on the picture to see the difference between the original image and the one with applied changes. If you are satisfied with the changes, select Done in the top right corner.
Conclusion
Now, you should know how to edit a sunset photo on iPhone and see each process step. To get the best final result, you must learn how to preserve a specific state of balance. Enhancing colors and details while keeping the scene natural is key to editing your sunset photos. Every sunset is unique; it is better to learn to trust your eye and creative style. Experiment with different settings until the images capture the mood you remember or the one you want the viewer to remember.

Once you’ve mastered editing, explore some of the best places—like Paphos—where you can capture truly unforgettable sunsets in Sunset Shots Are Cliché But These 6 Paphos Spots Are Worth It.