There are circumstances in which people prefer to blur faces in an image. One main reason people do it is privacy concerns. It is either the main subject of your photo, or you want to blur the face(s) of bystanders around or in the background. There is also a third group of people who enjoy blurring human faces for aesthetic reasons. In all of these cases, Hypic face blur becomes a powerful tool that will let you do all of the given examples.
You can keep the identity private for everyone on all your images, whether intended for online or offline audiences. This article provides a step-by-step guide to blurring a face in the Hypic app across different scenarios and with various approaches. At the end, I will also compare when it is more appropriate to use Pixelation instead of the blur effect.
What Is Hypic and When Should You Blur a Face?
Hypic is a mobile photo editing app with many free features. It slowly became popular for its versatile effects, filters, AI images, adjustments, retouching, but also free, ready-to-use templates (including text and graphic elements such as stickers). Many people started to use it as a go-to photo editing app for images when they need quick edits but with a more aesthetic feel for their social media.
Main Hypic app features
- Easy-to-use
- An AI-powered modern app
- It was designed for fast mobile editing
Hypic apps are an ideal choice for social media and content creators, but casual photographers can also find some of their features helpful.
Many people assume that blurring a face is easy. Hypic face blur offers a simple and advanced way to create a blurry face effect. It is essential to know its limitations – it can save you time.
Below, I’ll break down every face-blurring method in Hypic that I’ve personally tested. This helps you understand your options before making any edits to your photos.
Can You Blur Faces in Hypic?
The simple answer is yes, you can blur faces, but there isn’t one automatic face blur tool. However, the Hypic app uses AI to detect faces through the AI eraser tool.
How to Blur a Face in Hypic – easy option
I will start by showing you the most basic, straightforward way using the tool called Erase. You can use this approach to blur part of or the entire image. But the latter case might be a little bit more tedious and time-consuming.
- Upload a photo to your Hypic App.
- Find the Erase tool in the bottom menu under Templates.
- Tap Erase, and a new menu will appear above.
- Find and tap on Mosaic.
- Another new menu will appear with a couple of options, including Blur, Motion Blur, Triangle, Hexagon, Crayon, and others.
- Choose either the Blur or the Motion Blur.
- You can adjust the size of your Blur tool with the brush size slider.
- When you are satisfied with the size, tap the face or any part of the image you want to blur with your finger.
- Tap over the place on the image until you are satisfied with the effect.
- Then click the checkmark in the bottom-right corner of the menu to apply the changes.
- If you don’t see a significant change, reapply the effect a couple of times. The motion blur is doing a better job with this Erase tool.

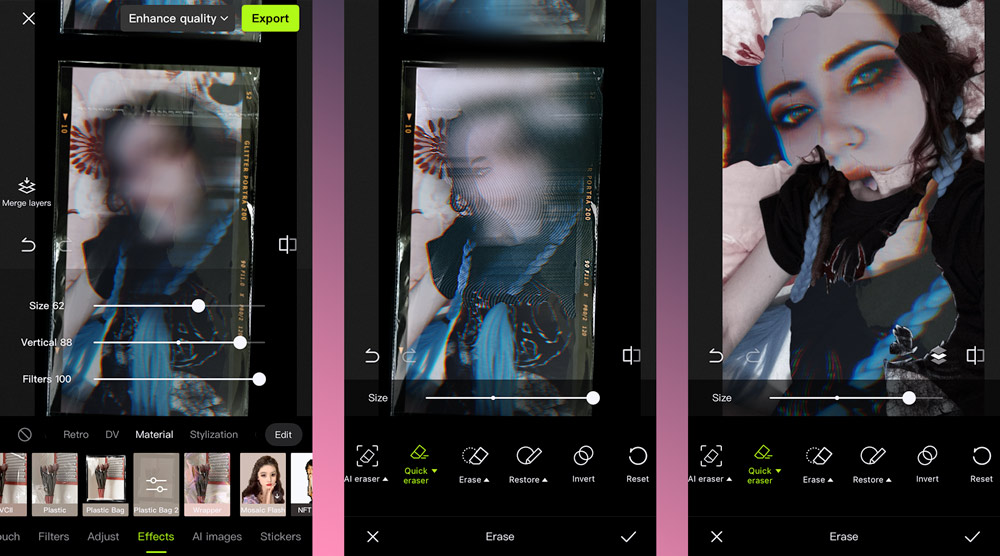
How to Blur the whole image or its parts – advanced
This approach is more complicated, as you will learn to work with specific effects, layers, AI-based erasers, and manual erasers.
- Start by uploading a photo in the app.
- Find Effects in the bottom menu, starting with item Templates.
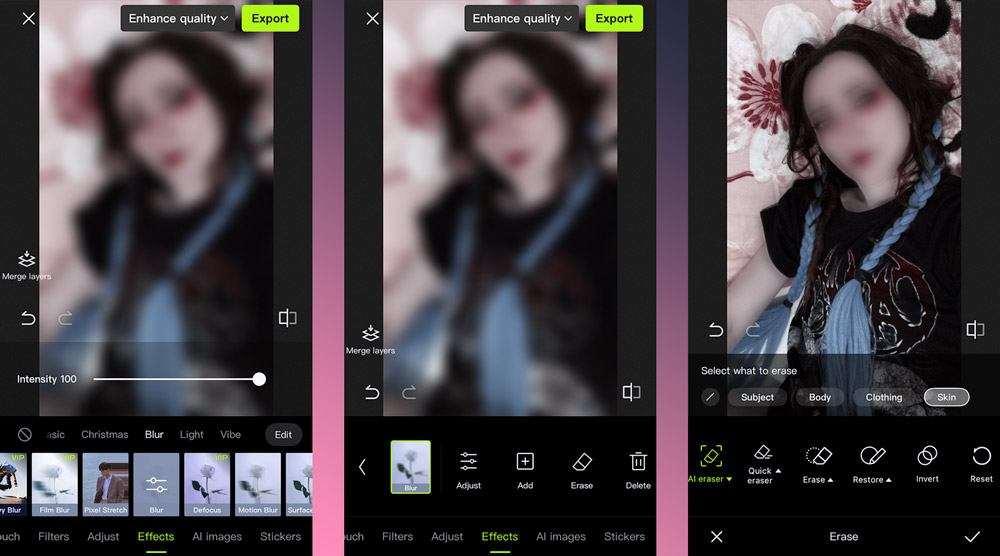
- Within Effects, find the Blur option.
- Tap on the Blur feature. (There are a couple of different Blur features, one basic Blur and then some more, including Motion Blur, Surface Blur, Long Exposure, Mosaic, and more.) For this tutorial, I will start with the basic Blur.
- Double-tap to open the menu that lets you adjust the effect intensity from 0 to 100.
- Choose how much the Blur should be.
- Then tap on Edit in the right corner when you have your Blur effect selected.
- The new menu will pop up. It will include items: selected Blur effect, Adjust, Add, Erase, Delete and Order.
- Tap on Erase.
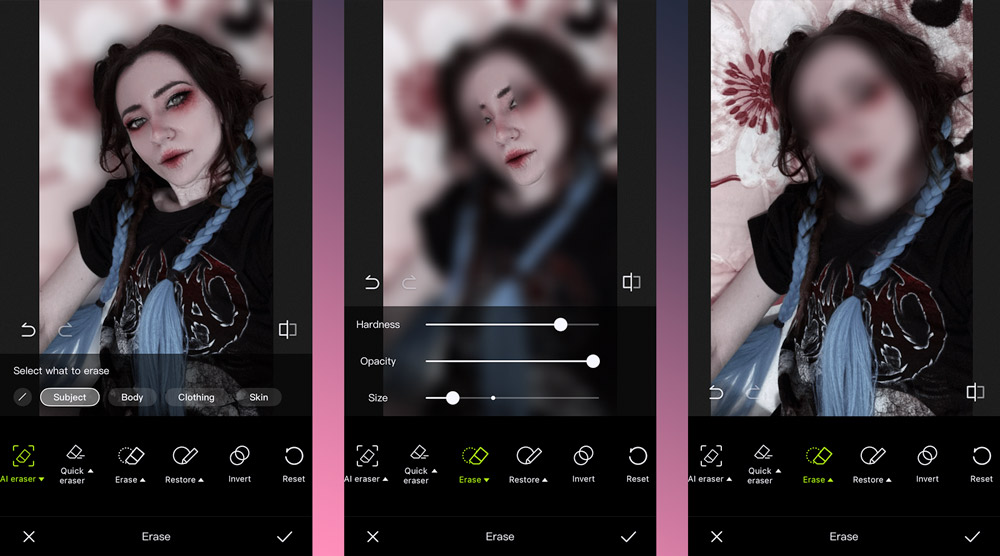
- A new menu will pop up – choose AI eraser. AI will ask you what you want to erase – Subject, body, skin, sky, etc. Choose your option. Be aware that AI face detection may not always work well. If that happens, you will need to use manual Erase.
- The Manual Erase tool lets you change its hardness, opacity, and size. Adjust and tap on your face or the part you want to blur. You will de-blur it. But don’t be confused. Then tap on Invert. Now you should have the face blurred. You will need to play with this manual Erase tool to find out how it works properly. Don’t be afraid to experiment with it.
- When you are satisfied with the outcome, tap on the checkmark in the right corner.
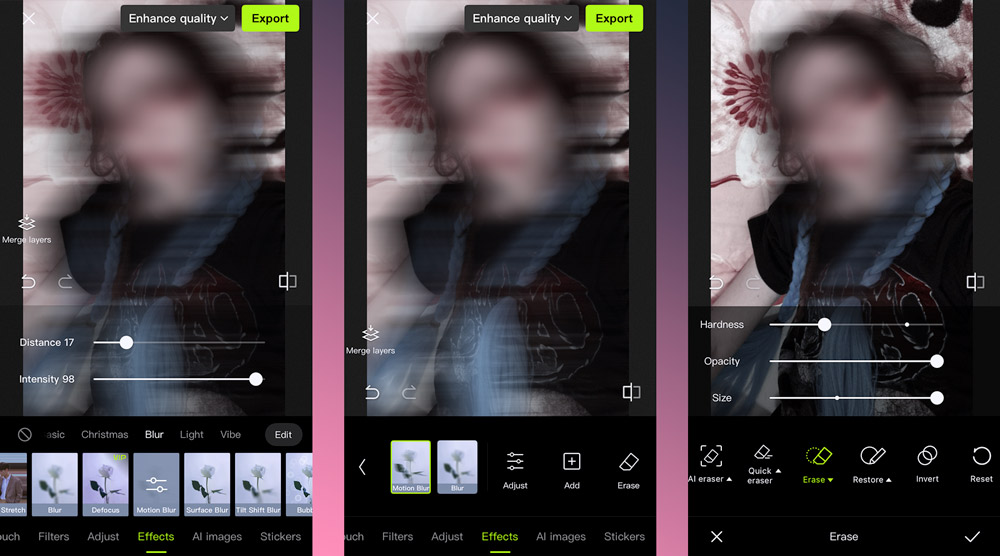
- You will be back in the previous menu, which lets you adjust the former effect, erase it, or delete it, but you can also add another one as a new layer. Just tap on the Add.
- Select the effect you want, or try a different blur tool, such as Motion Blur. After that, follow the same steps starting from step 16.
- You will notice one difference. When you tap on Edit, you will get a menu with a new item named Order. It lets you reorder the applied effects.
How Strong Should Face Blur Be?
Those who wonder when it is better to use firmer or softer Hypic face blur, here are some tips:
Use a lighter Hypic face blur when the face is still recognizable for more aesthetic edits. You can blur only the eyes or the background faces.
When using a strong Blur, the face(s) become unrecognizable. It is better for privacy and legal safety. This option is ideal for strangers, children, public spaces, and for any photo-documentary work where it is crucial to keep the people anonymous.
When you are not satisfied with the intensity of your Blur, use manual adjustment. Keep in mind that on bigger screens, your Edit can look different, so whenever you are making changes, zoom in. Sometimes, also Blur that seems strong enough while editing may appear weaker after upload.

Face Blur vs Face Pixelation – What's Better?
Hypic face blur smooths facial features or creates a soft aesthetic. When you use Pixelation, facial features are replaced with a block of color. They will completely hide any details.
Pros and cons of each
- Face blur looks more natural and artistic (but it depends on your creative choices, too)
- The Hypic face blur blends better with the background.
- One of its main cons is that the light Blur is less secure.
- Face pixelation is a stronger option for anonymity and privacy.
- Pixelation prevents recognition even at trim blur levels (but not the smallest).
- It may look too artificial or distracting.
- For some people, this aesthetic is not enough. (In case you are doing glitch art, you may love it.)
Final Thoughts: When to Use Hypic for Face Blurring
Hypic face blur is an excellent tool for manually blurring faces or other parts of a static image, especially for social media. While the app doesn’t currently offer automatic face-detection blur, it does provide an Eraser tool with some AI, which can be tricky for beginners to use correctly. Manual precision is often required. The AI automatic detection may not always give the best results. Some users may find manual blurring time-consuming or difficult to achieve accurate results using just their fingers on the screen. With a bit of practice, however, Hypic makes face blurring straightforward, practical, and visually appealing.
Sources:
Sources: