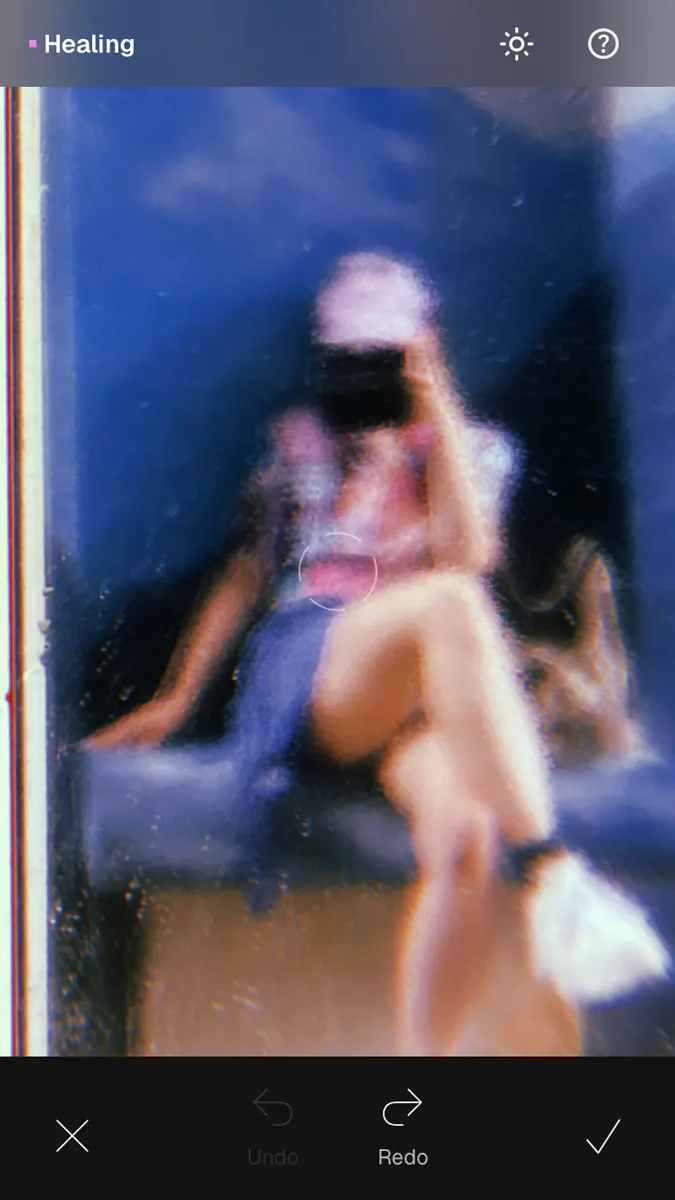
Snapseed is an easy-to-use app for Android and iPhone users. It offers a wide range of editing tools, including the Healing tool. It works best with simple compositions and smaller objects. You can use it to remove not only objects but also people.
I have already mentioned this tool and included some photo examples in my previous article How to Remove Tourists from Photos. This tutorial is a step-by-step guide where I demonstrate how to remove objects and people from your photos. It also includes example images and screenshots to illustrate the process.
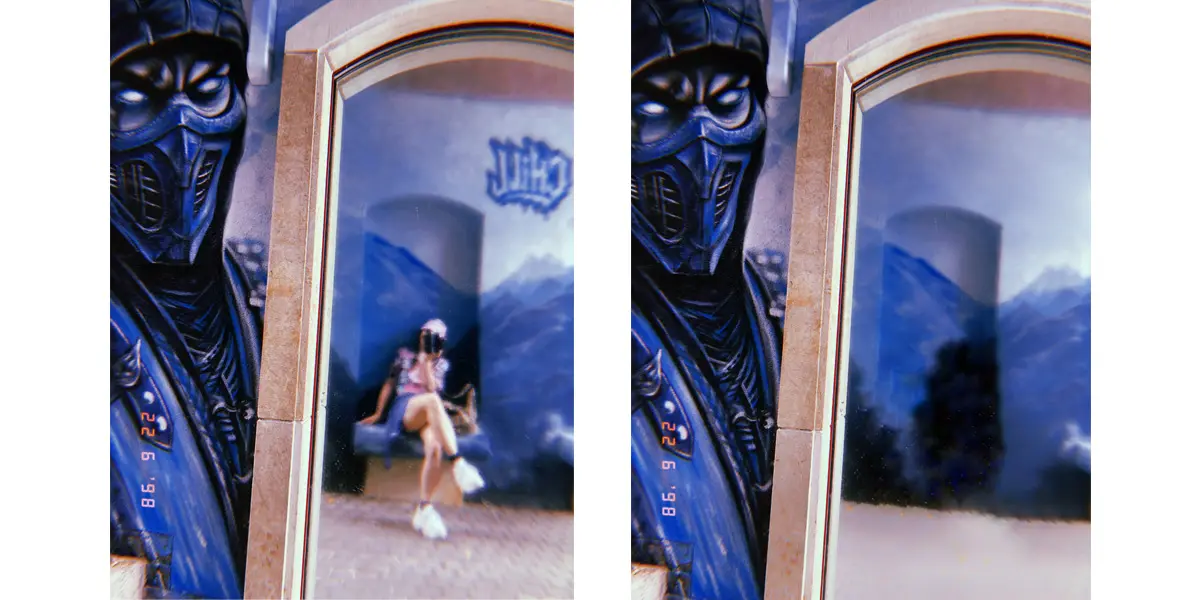
Before and After
How to Remove an Object in Snapseed
Before you start, choose a suitable picture where you want to remove a specific object. It is better to use the Healing tool to remove something small or an object against a simple background.
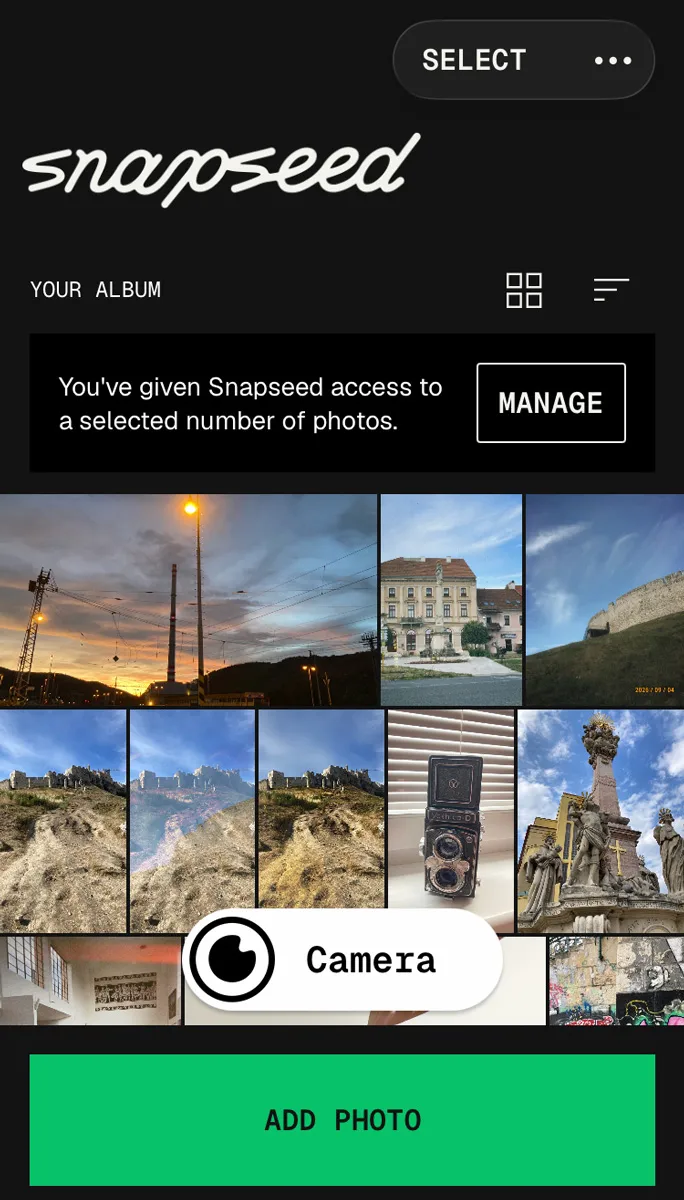
Start by opening the app. Then choose a photo from your gallery, or add a new one by tapping the green Add Photo button.
Snapseed Interface – Gallery
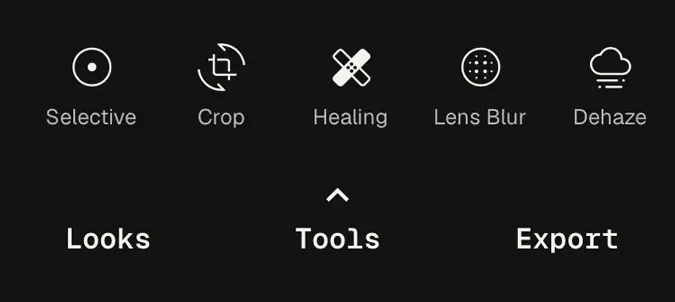
Now you should be inside the photo editor interface. It has a top menu, the image you are going to edit, an adjustment menu below the image, and a bottom menu.
Snapseed Interface and Healing Tool
The adjustment menu includes the Healing tool. Tap on it.
Now you can start sliding your finger across the screen. Tap and drag over the areas containing unwanted objects.
Unfortunately, it is not possible to choose the size of your brush. However, you can zoom in and out. This makes the brush smaller relative to the image and gives you better control over specific parts of your photo.
You can also redo or undo your editing choices. When you are satisfied with your edits, simply tap the check button.
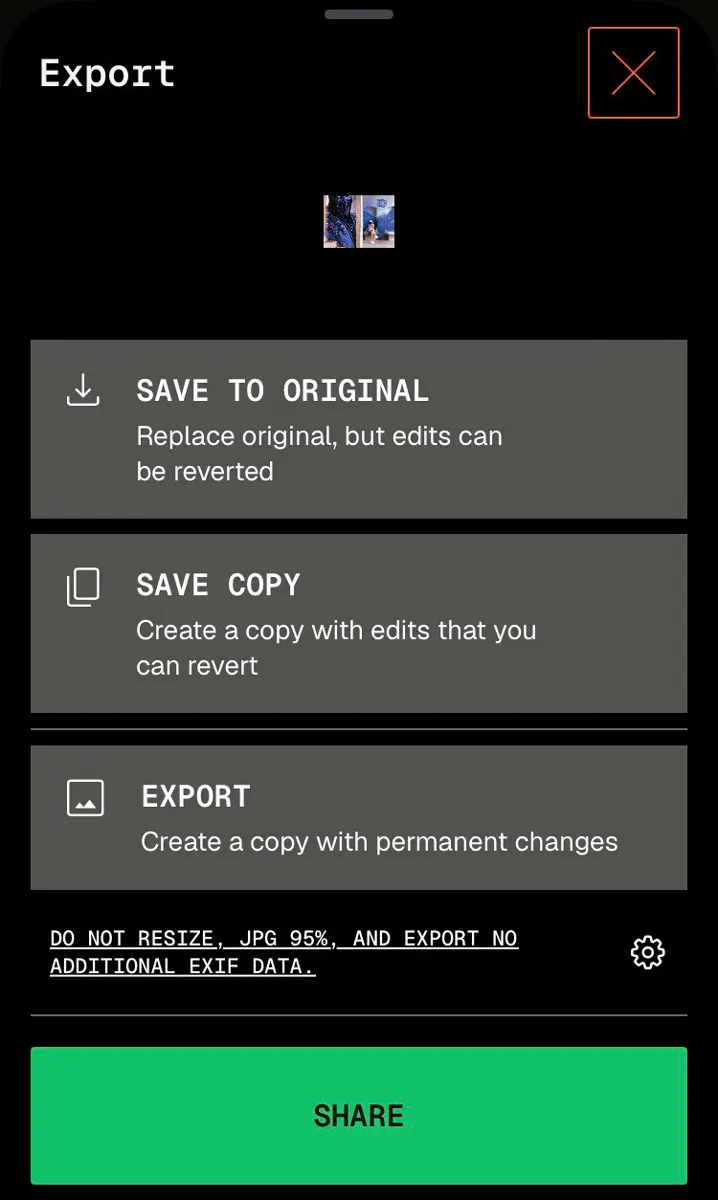
You can now tap the Export button if you don’t need to make any other changes.
Snapseed Export
How to Remove People in Snapseed
When you want to remove people in Snapseed, the process is similar to the previous example.
Start by choosing a suitable photo where the people you want to remove stand in front of a simple background. Avoid overly complicated structures such as architectural details, ornaments, or other elements with complex patterns.
Select your photo in the gallery and then tap the Healing tool inside the editor.
Snapseed Remove People – Zoom In
Zoom in on the area where you want to remove a person or people. Start tapping and dragging over the unwanted areas. You might not get a good result on your first attempt, so be prepared to spend some time experimenting with the tool. When the edit looks good, simply tap the check icon at the bottom.
If you are not completely happy with the result, follow the tips below.
Tips for Better Results
The Healing tool works best when you give it a little extra attention. Here are some tips that can help you get cleaner results when removing objects or people in Snapseed.
Zoom in before using the Healing tool
Working with a larger view gives you better control over the area you want to remove. This is especially useful when working around small details or edges.
Work in smaller sections
Avoid trying to remove a large object or person with one long stroke. Instead, work on smaller areas and check the result as you go. This can help reduce unwanted patterns and make the final result look more natural.
Try Selective and Structure after using Healing
In some cases, the Healing tool can leave a visible repeating pattern, similar to a stamp effect in Photoshop. I found that you can soften these traces by using the Selective tool after removing the object. Add a control point to the edited area, open the additional adjustment options, and lower Structure. This creates a softer, slightly blurred surface that can help hide uneven areas left by the Healing tool.
Try the Healing tool again if the first result does not look right
Sometimes the tool creates an unwanted pattern or copies an unsuitable part of the surrounding image. Undo the edit and try working on a smaller area instead.
Keep the original photo untouched
When you are experimenting with object removal, it is better to keep the original image so you can try the edit again or use another editing method later. When saving use the Save Copy which allows revert changes or Export and create a copy with permanent changes.
Original Image
Object Removed (Top Right Corner)
Person Removed
What to Do When Snapseed Remove Object Produces Bad Results
Sometimes the Healing tool simply cannot produce a clean result. This can happen when the unwanted object is large, covers important details, or appears in front of a complicated background.
In these situations, it may be better to use another photo editing method instead of spending too much time trying to fix the same area in Snapseed.
For travel photos, I often need more than one tool to remove unwanted people or objects. In my guide How to Remove Tourists from Photos, I show several different methods you can try, including options that give you more control over the final result.
Final Thoughts
Overall, I would give Snapseed’s Healing tool a C. It can work well for smaller objects and simple backgrounds, but I often need to spend quite a lot of time correcting the result to get something that looks precise and natural.
Compared with Adobe Photoshop or Lightroom, I find the results less reliable, especially when with more complicated images. For quick edits on mobile, Snapseed can be useful, but when I need precise object removal, I would still choose one of Adobe’s programs.
We use cookies to optimize your experience, personalize content, and analyze our traffic. By clicking "Accept All", you agree to our use of cookies for a smoother and faster browsing experience. Learn more in our Privacy Policy.
Contains information related to marketing campaigns of the user. These are shared with Google AdWords / Google Ads when the Google Ads and Google Analytics accounts are linked together.
90 days
__utma
ID used to identify users and sessions
2 years after last activity
__utmt
Used to monitor number of Google Analytics server requests
10 minutes
__utmb
Used to distinguish new sessions and visits. This cookie is set when the GA.js javascript library is loaded and there is no existing __utmb cookie. The cookie is updated every time data is sent to the Google Analytics server.
30 minutes after last activity
__utmc
Used only with old Urchin versions of Google Analytics and not with GA.js. Was used to distinguish between new sessions and visits at the end of a session.
End of session (browser)
__utmz
Contains information about the traffic source or campaign that directed user to the website. The cookie is set when the GA.js javascript is loaded and updated when data is sent to the Google Anaytics server
6 months after last activity
__utmv
Contains custom information set by the web developer via the _setCustomVar method in Google Analytics. This cookie is updated every time new data is sent to the Google Analytics server.
2 years after last activity
__utmx
Used to determine whether a user is included in an A / B or Multivariate test.
18 months
_ga
ID used to identify users
2 years
_gali
Used by Google Analytics to determine which links on a page are being clicked
30 seconds
_ga_
ID used to identify users
2 years
_gid
ID used to identify users for 24 hours after last activity
24 hours
_gat
Used to monitor number of Google Analytics server requests when using Google Tag Manager
1 minute
Marketing cookies are used to follow visitors to websites. The intention is to show ads that are relevant and engaging to the individual user.
This script provides interactive maps and affiliate tools for searching and booking accommodations and flights. Cookies are used to correctly display prices, availability, and to anonymously track affiliate booking commissions.